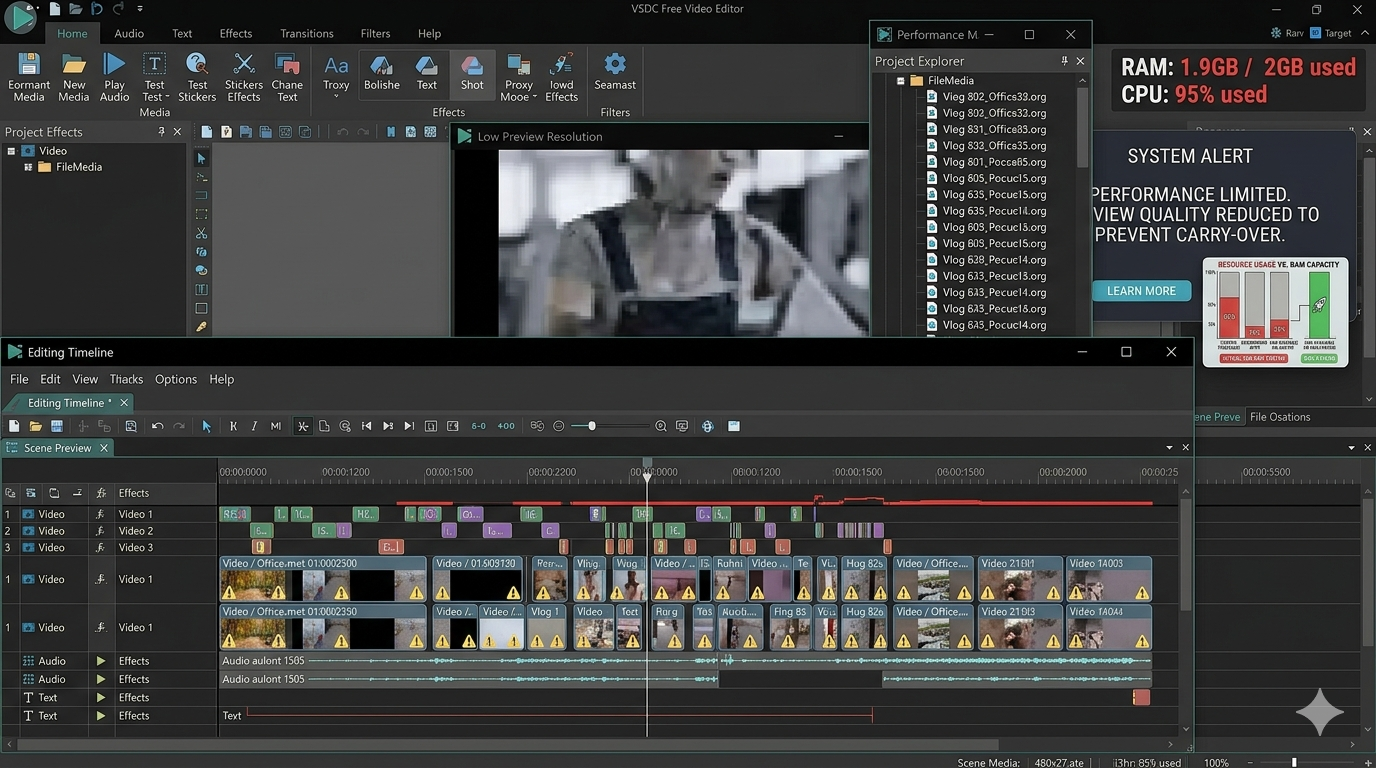
If your video editor freezes every few seconds, the preview drops frames, or your laptop sounds like it is about to take off just because you added a transition, you are not alone.
A lot of video-editing advice starts with the same solution:
Buy a better PC.
That advice is sometimes correct.
But it is not always the first thing you should do.
A low-end computer can often handle basic and even moderately complex video editing if you use the right workflow. The problem is that modern cameras and phones produce large, highly compressed files, while editing software has to decode those files, display them on a timeline, process effects, manage audio, and eventually export the finished video.
That is a lot of work for an older laptop.
The good news is that you can reduce much of that workload without buying a new computer.
In this guide, I will show you a practical low-end PC editing workflow covering RAM, storage, preview resolution, proxies, video formats, background applications, effects, project settings, and export settings.
The goal is not to make a weak computer behave like a gaming PC.
The goal is to make your existing hardware work as efficiently as possible.
Quick answer: To reduce video editing lag on a low-end PC, use a lower preview resolution, edit from an SSD when possible, use proxy or optimized media for heavy footage, close unnecessary background programs, avoid excessive effects, keep your project settings sensible, and export using settings your computer can realistically handle.
What Counts as a Low-End PC for Video Editing?
There is no single definition of a low-end computer.
For video editing, however, you will commonly encounter systems with combinations such as:
- 4GB RAM
- 8GB RAM
- Integrated graphics
- Older Intel or AMD processors
- HDD storage
- Small SSDs
- Older laptops
- Entry-level CPUs
- Limited cooling
A computer with 8GB RAM and an SSD can behave very differently from a computer with 8GB RAM and an old HDD.
That is why saying:
“My PC has 8GB RAM, so it should edit everything.”
doesn’t tell us enough.
Video editing performance depends on the entire workflow.
Your source footage matters.
Your codec matters.
Your resolution matters.
Your editor matters.
Your effects matter.
Your storage matters.
And the way you configure the project matters.
Why Video Editing Lags on a Low-End PC
Before fixing the problem, you need to understand what is causing it.
There are several common reasons.
1. Your video files are too demanding
A 4K video is much heavier to process than a 720p clip.
But resolution is only part of the story.
Modern phones and cameras may record using codecs such as H.265/HEVC. These codecs can reduce file size, but decoding them during editing can be demanding on older hardware.
This creates a frustrating situation:
The video looks perfectly normal when you watch it.
But when you put it on a timeline, playback becomes terrible.
That is because video playback and video editing are different workloads.
2. Your timeline contains too many effects
Every effect adds processing work.
Examples include:
- Blur
- Noise reduction
- Stabilization
- Motion effects
- Color correction
- AI effects
- Background removal
- Multiple overlays
- Animated titles
- Complex transitions
A simple cut may require very little processing.
A clip with several effects stacked together can require considerably more.
If your PC starts lagging after adding effects, don’t immediately blame the editor.
Temporarily disable the effects and test the timeline again.
That simple test can tell you whether the problem is your footage or your effects.
3. Your project is stored on a slow HDD
This is one of the most overlooked problems.
If your operating system, editing software, project files, cache and source footage are all fighting for access to a mechanical hard drive, the entire editing experience can become sluggish.
An SSD generally provides much faster storage access than an HDD.
That does not magically increase your CPU performance.
But it can make opening files, loading projects, accessing media and handling cache files feel considerably more responsive.
If your computer still uses an HDD, storage may be one of the first areas worth investigating.
4. Your PC is running too many programs
This sounds boring.
It is also one of the easiest things to fix.
If you have your editor open alongside:
- Chrome with 20 tabs
- Spotify
- Discord
- Photoshop
- cloud-sync software
- game launchers
- other background applications
you are asking a low-RAM computer to divide its resources between everything.
On a 4GB system, this can become especially painful.
Before editing, close anything you do not need.
You don’t need to buy anything.
You just need to stop making your computer do unnecessary work.
The Low-End PC Video Editing Workflow
Here is the workflow I recommend starting with.
Step 1: Organize your footage.
Step 2: Check the footage resolution and codec.
Step 3: Put the project and cache on the fastest available storage.
Step 4: Lower preview quality.
Step 5: Create proxies for difficult footage.
Step 6: Keep effects under control.
Step 7: Edit the story before adding heavy effects.
Step 8: Save regularly.
Step 9: Export with sensible settings.
Let’s break down each step.
Step 1: Don’t Start by Adding Effects
This is a common beginner mistake.
People import their clips and immediately start adding:
- transitions
- animations
- filters
- text
- color effects
- stickers
- sound effects
Then the timeline becomes slow.
Instead, start with the basic edit.
First pass
Cut unwanted footage.
Second pass
Arrange your clips.
Third pass
Fix audio.
Fourth pass
Add text and simple transitions.
Final pass
Add heavier effects only where they actually improve the video.
This gives your computer less work while you are making the important editing decisions.
It also makes editing easier.
Step 2: Lower the Preview Resolution
Your final video does not have to look perfect while you are editing.
This is a mistake many beginners make.
Suppose you are editing a 1080p video.
You can often reduce the preview quality to something like:
- 720p
- 540p
- 480p
depending on what your editor offers.
The exact options differ between programs.
The important distinction is:
Preview quality is not necessarily export quality.
You can edit using a lower-quality preview and still export the final video at your intended resolution.
If your timeline is stuttering, lowering preview quality should be one of the first tests you make.
Step 3: Use Proxy Editing for Heavy Footage
Proxy editing is one of the most useful techniques for weak computers.
A proxy is a lower-resolution working copy of your original video.
For example:
Original footage
4K → large and demanding
Proxy footage
720p or another lower-resolution version → easier to decode
You edit using the proxy.
When you export, your editor can use the original media.
The important idea is simple:
Your computer doesn’t need to constantly process the full-quality original just to show you where you are cutting the clip.
This is especially useful when working with:
- 4K footage
- H.265/HEVC
- high-bitrate footage
- long recordings
- multiple camera sources
If you want to understand proxies in more detail, this should become one of the major supporting articles in TheEditFlows’ internal-link structure.
Step 4: Don’t Automatically Edit in 4K
This is another major misconception.
Just because your phone records 4K does not mean your final video needs to be 4K.
Ask yourself:
Where will this video be published?
If the answer is TikTok, Instagram Reels, YouTube Shorts, or another platform where your final delivery does not require 4K, a 1080p workflow may be more practical.
For a low-end PC, reducing the amount of data your computer has to process can make a major difference.
A practical approach
If your source is 4K but your final project is 1080p:
- Import your footage.
- Create proxies if playback is still difficult.
- Set the project/timeline to the intended delivery resolution.
- Edit using lower preview quality.
- Export the final video at the required resolution.
Don’t confuse:
source resolution
with
delivery resolution.
They do not always have to be identical.
Step 5: Understand H.264 vs H.265
Your file extension alone doesn’t tell you how difficult the footage will be to edit.
Two MP4 files can behave very differently.
H.264 is widely supported and is often easier to work with than H.265/HEVC on older systems, although actual performance depends on the hardware and software.
H.265 can provide efficient compression and smaller files, but older CPUs may struggle more when decoding it.
If your phone footage is H.265 and your editor struggles badly, consider using proxies or transcoding the footage into a more editing-friendly format.
Don’t convert everything blindly.
Conversion takes time and creates additional files.
Use it when the original format is actually causing a workflow problem.
Step 6: Edit From an SSD When Possible
If your computer has both an SSD and an HDD, use them intelligently.
A simple arrangement could be:
SSD
- Operating system
- Video editor
- Active project
- Cache/scratch files, where practical
HDD
- Archived footage
- Completed projects
- Old files
- Backups
You don’t need an enormous SSD to benefit from faster storage.
Even a smaller SSD can be useful if you reserve it for active projects.
However, don’t fill an SSD completely.
Leave enough free space for the operating system and applications to work normally.
Step 7: Free Your RAM Before Editing
If you only have 4GB RAM, every background program matters more.
Before starting a demanding edit:
Close unnecessary applications
Especially:
- browsers
- games
- launchers
- messaging apps
- unnecessary file-sync tools
Avoid giant browser sessions
A browser with dozens of open tabs can consume a surprising amount of memory.
Restart when necessary
If your computer has been running for days and feels unusually sluggish, a restart can clear accumulated processes and memory pressure.
This isn’t a magical optimization.
It is basic housekeeping.
But on a weak computer, basic housekeeping matters.
Step 8: Use Fewer Heavy Effects
You don’t need an effect on every clip.
In fact, most good editing is about deciding what not to add.
For low-end hardware, be especially careful with effects such as:
- advanced stabilization
- heavy blur
- denoise
- AI background removal
- complex motion graphics
- multiple adjustment layers
- high-quality previews
- complicated compositing
If an effect causes your timeline to collapse from smooth playback to constant stuttering, turn it off while you continue editing.
You can enable it again during the final stage.
This is sometimes called a “lightweight editing pass.”
The principle is simple:
Make creative decisions first. Make the computer do expensive processing later.
Step 9: Use Render or Preview Files When Available
Some video editors allow you to render difficult sections of your timeline.
This means the software processes that section ahead of time so you don’t have to calculate every effect again during playback.
If your editor provides a render-preview feature, learn how it works.
It can be useful when a particular section contains:
- multiple effects
- color correction
- transitions
- titles
- compositing
- stabilization
Instead of demanding real-time playback from a weak machine, let the computer process the difficult section once.
What Settings Should You Use?
There is no universal “best setting” for every computer.
But this is a sensible starting point for low-end systems:
| Setting | Starting point |
|---|---|
| Editing resolution | 720p or 1080p depending on hardware |
| Preview quality | Low / 1/2 / 1/4 where available |
| Heavy 4K footage | Use proxies |
| Storage | SSD preferred |
| Background programs | Close unnecessary apps |
| Effects | Keep them light during editing |
| Codec | Use an editing-friendly workflow when necessary |
| Final export | Match the platform and project requirements |
These are starting points, not guarantees.
Your actual hardware and footage determine what works.
Can You Edit 1080p Video on 4GB RAM?
Yes, but you need realistic expectations.
A 4GB RAM computer may handle simple 1080p projects.
For example:
- short clips
- simple cuts
- basic text
- one or two video tracks
- simple transitions
- limited effects
But problems become more likely when you combine:
- long timelines
- multiple layers
- high-bitrate footage
- H.265
- heavy effects
- large background applications
- insufficient storage
If your 1080p footage is difficult to edit, don’t immediately conclude that 1080p itself is impossible.
Test the variables.
Lower the preview.
Close background programs.
Try proxies.
Check whether the footage is H.265.
Check whether your project is on an HDD.
Then test again.
Can You Edit 4K Video on a Low-End PC?
Sometimes.
But don’t confuse possible with comfortable.
A low-end PC may technically open a 4K project while producing terrible playback.
That doesn’t mean your workflow is usable.
For weak hardware, a practical 4K workflow often looks like:
4K original
↓
Proxy/optimized media
↓
Lower preview resolution
↓
Simple editing
↓
Final export using original media
This lets you preserve high-resolution source material without forcing the computer to decode the full workload every time you press play.
What If Your Video Editor Keeps Crashing?
Lag and crashes are related, but they are not exactly the same problem.
If your editor repeatedly crashes, check:
1. RAM usage
Low available memory can contribute to instability.
2. Storage space
A nearly full drive can create problems for applications that need temporary files or cache space.
3. Project complexity
Try opening a simpler project.
4. Effects
Disable heavy effects and test again.
5. Software updates
Make sure you’re using a supported version.
6. Media files
A damaged or unusual media file can sometimes cause problems.
7. Autosave
Turn it on if your editor supports it.
Never assume a crash means you need to reinstall Windows immediately.
Find the trigger first.
The Biggest Low-End PC Editing Mistakes
Here are the mistakes I would fix before spending money on new hardware.
Mistake #1: Editing directly from an old HDD
Move active projects to faster storage when possible.
Mistake #2: Editing every project in 4K
Use the resolution your final project actually requires.
Mistake #3: Ignoring proxies
If your footage is difficult to decode, proxies can change the entire workflow.
Mistake #4: Running dozens of background applications
Your editor needs the resources.
Mistake #5: Adding effects too early
Finish the basic edit first.
Mistake #6: Assuming RAM is the only problem
CPU, storage, codec, GPU, thermals and software settings all matter.
Mistake #7: Buying hardware without identifying the bottleneck
Don’t spend money based on a guess.
If your HDD is the bottleneck, buying more RAM may not solve the main problem.
If your CPU cannot decode your footage efficiently, another storage drive won’t magically fix playback.
Find the bottleneck first.
When Should You Actually Upgrade Your PC?
Optimization has limits.
If you have already:
- moved active projects to an SSD
- closed unnecessary applications
- lowered preview quality
- used proxies
- reduced heavy effects
- optimized your project
- checked your footage format
and the machine is still struggling badly, hardware may genuinely be the problem.
At that point, upgrades can make sense.
RAM
Useful when memory is consistently the limitation.
SSD
Useful when you’re working from a slow HDD.
CPU
Important for decoding, editing and exporting workloads.
GPU
More important for editors and effects that can take advantage of GPU acceleration.
But don’t buy parts randomly.
Identify the bottleneck first.
My Low-End PC Editing Checklist
Before every editing session, run through this list:
Before editing
☐ Close unnecessary applications
☐ Make sure your project has enough free storage
☐ Put active projects on the fastest available drive
☐ Check your footage resolution
☐ Check whether your footage uses a demanding codec
During editing
☐ Lower preview quality if playback stutters
☐ Use proxies for heavy footage
☐ Avoid unnecessary effects
☐ Save regularly
☐ Render difficult sections when necessary
Before exporting
☐ Check the final resolution
☐ Remove unnecessary effects
☐ Make sure original media is available
☐ Close unnecessary applications
☐ Confirm you have enough free storage
A Simple Workflow for a 4GB RAM PC
If I had to build the simplest possible workflow for a 4GB RAM machine, I would start here:
1. Record or collect footage
↓
2. Copy it to the computer
↓
3. Store the active project on an SSD if available
↓
4. Create proxies for difficult footage
↓
5. Set preview quality low
↓
6. Build the rough cut
↓
7. Add audio
↓
8. Add simple text and transitions
↓
9. Add only necessary heavy effects
↓
10. Render difficult sections
↓
11. Export
This workflow isn’t glamorous.
That’s the point.
Low-end editing is less about having impressive hardware and more about avoiding unnecessary work.
What About a 2GB RAM PC?
Be realistic.
A 2GB RAM computer is severely constrained for modern video editing.
You may still be able to perform very basic tasks such as:
- trimming
- cutting
- joining clips
- simple conversions
But demanding modern editing workflows are likely to be frustrating.
If you’re working with only 2GB RAM, prioritize simple projects and lightweight software.
Don’t expect the same experience as an 8GB or 16GB system.
That isn’t a settings problem.
At some point, hardware becomes the limiting factor.
The Most Important Lesson
Here’s the mistake I see repeatedly in low-end PC editing:
People treat hardware as the entire problem.
It isn’t.
Your editing performance is the result of several things working together:
Hardware + footage + codec + software + project settings + workflow
Change one of those variables and your experience can change.
That’s why two people with similar RAM can have completely different editing experiences.
One might be editing short 1080p H.264 clips from an SSD.
The other might be editing 4K H.265 footage from an HDD with multiple effects and 20 browser tabs open.
Both might say:
“I have 8GB RAM.”
But those are completely different workloads.
Frequently Asked Questions
Can I edit videos on a low-end PC?
Yes. Basic video editing is possible on many low-end PCs if you use appropriate footage, lower preview settings, proxies and a lightweight workflow.
How do I stop video editing lag?
Start by lowering preview quality, closing background applications, checking your storage, reducing heavy effects and using proxy media for demanding footage.
Is 4GB RAM enough for video editing?
It can be enough for basic editing, especially with lighter projects. However, complex timelines, high-resolution footage and heavy effects can quickly exceed what a 4GB system can comfortably handle.
Can I edit 1080p on 4GB RAM?
Yes, but performance depends on the CPU, storage, codec, editor and project complexity. Keep the timeline simple and use proxies if necessary.
Can I edit 4K video on a low-end PC?
It may be possible with proxies or optimized media, but native 4K editing can be difficult on weak hardware.
Is an SSD better than an HDD for video editing?
An SSD is generally preferable for active editing projects because it provides faster storage access and can make file and project operations more responsive.
Do I need a graphics card for video editing?
Not necessarily. Some basic editing can be performed using integrated graphics. A dedicated GPU becomes more useful as your software and workload become more demanding.
Should I upgrade RAM or SSD first?
It depends on the bottleneck. If the computer constantly runs out of memory, more RAM may help. If your active projects are on a slow HDD, an SSD may provide a more noticeable improvement in storage-related responsiveness.
Why does my video play smoothly but lag inside the editor?
A media player primarily needs to decode and display the video. An editor may need to decode the source while also processing timeline edits, effects, multiple layers and audio. That’s why a file can play normally but struggle on a timeline.
Does lowering preview quality reduce final video quality?
No. Preview quality and export quality are separate settings in many editors. Lowering the preview can make editing easier while allowing you to export at your intended final resolution.
Final Thoughts
You don’t need to pretend that a weak PC is secretly powerful.
It isn’t.
But you also don’t need to give up on video editing just because your computer isn’t expensive.
The smarter approach is to reduce unnecessary workload.
Start with the free fixes:
Lower the preview.
Close background programs.
Use proxies.
Avoid unnecessary effects.
Move active projects to an SSD when possible.
Choose a realistic project resolution.
Check your footage codec.
Then test your workflow again.
If your PC still struggles after all of that, you have useful information: you’ve probably reached a genuine hardware limitation.
And that’s when an upgrade becomes a decision based on evidence rather than frustration.
The goal isn’t to make a low-end PC perform like a high-end workstation.
The goal is much simpler:
Make the computer you already own do the job as efficiently as possible.
Recommended TheEditFlows Guides
If you want to build a complete low-end editing workflow, continue with these related guides:
- Proxy Editing: Learn why proxy media can make difficult footage easier to edit.
- SSD vs HDD for Video Editing: Understand where storage can affect your workflow.
- Why Your Video Editor Keeps Crashing: Troubleshoot crashes and freezes.
- How to Edit 4K Video on a Low-End PC: Build a practical 4K workflow.
- Lightweight Video Editors: Compare editors designed for less powerful computers.
These pages should be connected through internal links so readers can move from the basic workflow to specific problems and solutions.
Editor’s Note
The recommendations in this guide are starting points, not guarantees. Video editing performance varies significantly between computers and software versions. Before purchasing hardware, identify the component or workflow step that is actually limiting your system.
Disclosure
TheEditFlows may update this guide as software, hardware and editing workflows change. Any product or software recommendation should be evaluated against the reader’s own hardware, operating system and editing requirements.