
How to Edit Videos on a Low-End PC (Step-by-Step Beginner Guide)
How to Edit Videos on a Low-End PC (Step-by-Step Guide for Beginners)
🔥 Introduction
If your PC lags or freezes while editing videos, it doesn’t mean you can’t edit at all.
Most beginners struggle because they:
-
Use heavy software
-
Follow tutorials made for high-end PCs
-
Ignore performance settings
In this guide, you’ll learn how to edit videos smoothly on a low-end PC, even with 2GB–8GB RAM.
🧠 What You Need Before You Start
Let’s be realistic.
If your PC has:
-
2GB RAM → Only basic editing
-
4GB RAM → Smooth editing with optimization
-
8GB RAM → Comfortable beginner editing
👉 Don’t expect high-end performance — focus on efficiency.
🛠 Step 1: Choose the Right Software
This is where most people fail.
👉 Avoid heavy tools like:
-
Premiere Pro
-
DaVinci Resolve
✅ Use lightweight software instead:
-
VSDC (best for very low-end PCs)
-
CapCut (best for beginners)
-
Filmora (balanced option)
👉 If you chose wrong software, everything else becomes harder.
📂 Step 2: Use Low-Resolution Files
Editing high-quality videos on a weak PC = lag.
✅ Do this:
-
Convert videos to 720p
-
Use smaller file sizes
-
Avoid 4K editing
👉 This alone can reduce lag massively.
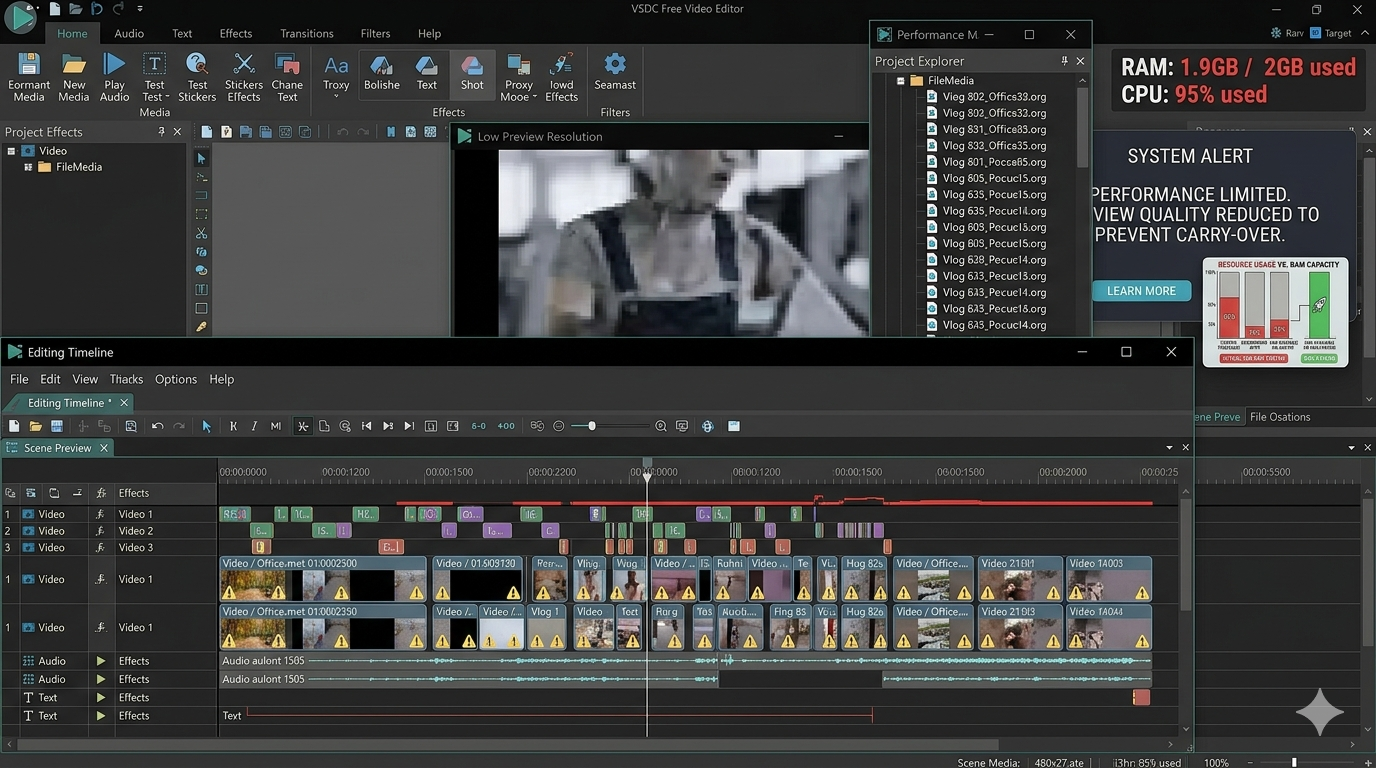
⚡ Step 3: Lower Preview Resolution (MOST IMPORTANT)
This is the #1 trick beginners ignore.
✅ Change preview settings:
-
Set preview to 480p or Low
-
Disable high-quality playback
👉 This does NOT affect final export quality.
👉 It only makes editing smoother.
🧩 Step 4: Close Background Apps
Your PC has limited resources.
❌ Don’t do this:
-
Run Chrome with 10 tabs
-
Keep apps open
-
Run downloads in background
✅ Do this:
-
Close everything except editor
-
Free up RAM
👉 More RAM = smoother editing
🎬 Step 5: Use Simple Editing Techniques
If your PC is weak:

❌ Avoid:
-
Heavy transitions
-
Complex effects
-
Multiple layers
✅ Focus on:
-
Cuts
-
Basic transitions
-
Simple text
👉 Simplicity = performance
⚙️ Step 6: Enable Proxy Editing (If Available)
Some software allows this.
What it does:
-
Uses low-quality preview files
-
Keeps editing smooth
-
Renders full quality later
👉 If available → ALWAYS use it
💾 Step 7: Export Smartly
Wrong export settings = slow + crashes

✅ Use:
-
Resolution: 720p or 1080p
-
Bitrate: Medium
-
Format: MP4
👉 Don’t export at ultra-high settings on weak PCs
❌ Common Mistakes Beginners Make
Let me be blunt:
-
Installing heavy software
-
Editing 4K videos
-
Ignoring preview settings
-
Running too many apps
👉 These are the real reasons your PC lags
🎯 Final Advice
If your PC is low-end:
👉 Don’t fight your hardware
👉 Work WITH it
Use:
-
Lightweight software
-
Low settings
-
Simple workflow
I tested these settings on:
4GB RAM laptop
Intel i3 processor
No GPU
Result:
- Before: heavy lag (2–3 sec delay)
- After: smooth playback with minor stutter
🔗 What to Read Next
👉 Best Video Editing Software for Low-End PCs
👉 How to Fix Lag in Video Editing
Pingback: How to Fix Lag in Video Editing (Low-End PC Complete Guide)
Pingback: Fix Video Editing Lag on Low-End PC (Beginner Guide 2026) - TheEditFlows
Pingback: Top 10 Lightweight Video Editors for Slow Computers (4GB RAM Tested) - TheEditFlows
Pingback: Best Export Settings for Low-End PCs (Faster Video Renders in 2026)
Pingback: Complete Beginner Guide to Video Editing (Step-by-Step 2026)